Frequently Asked Questions
Setup, pairing, updates and UK support — answers for getting the most out of your DiagProg5.
01
First Steps
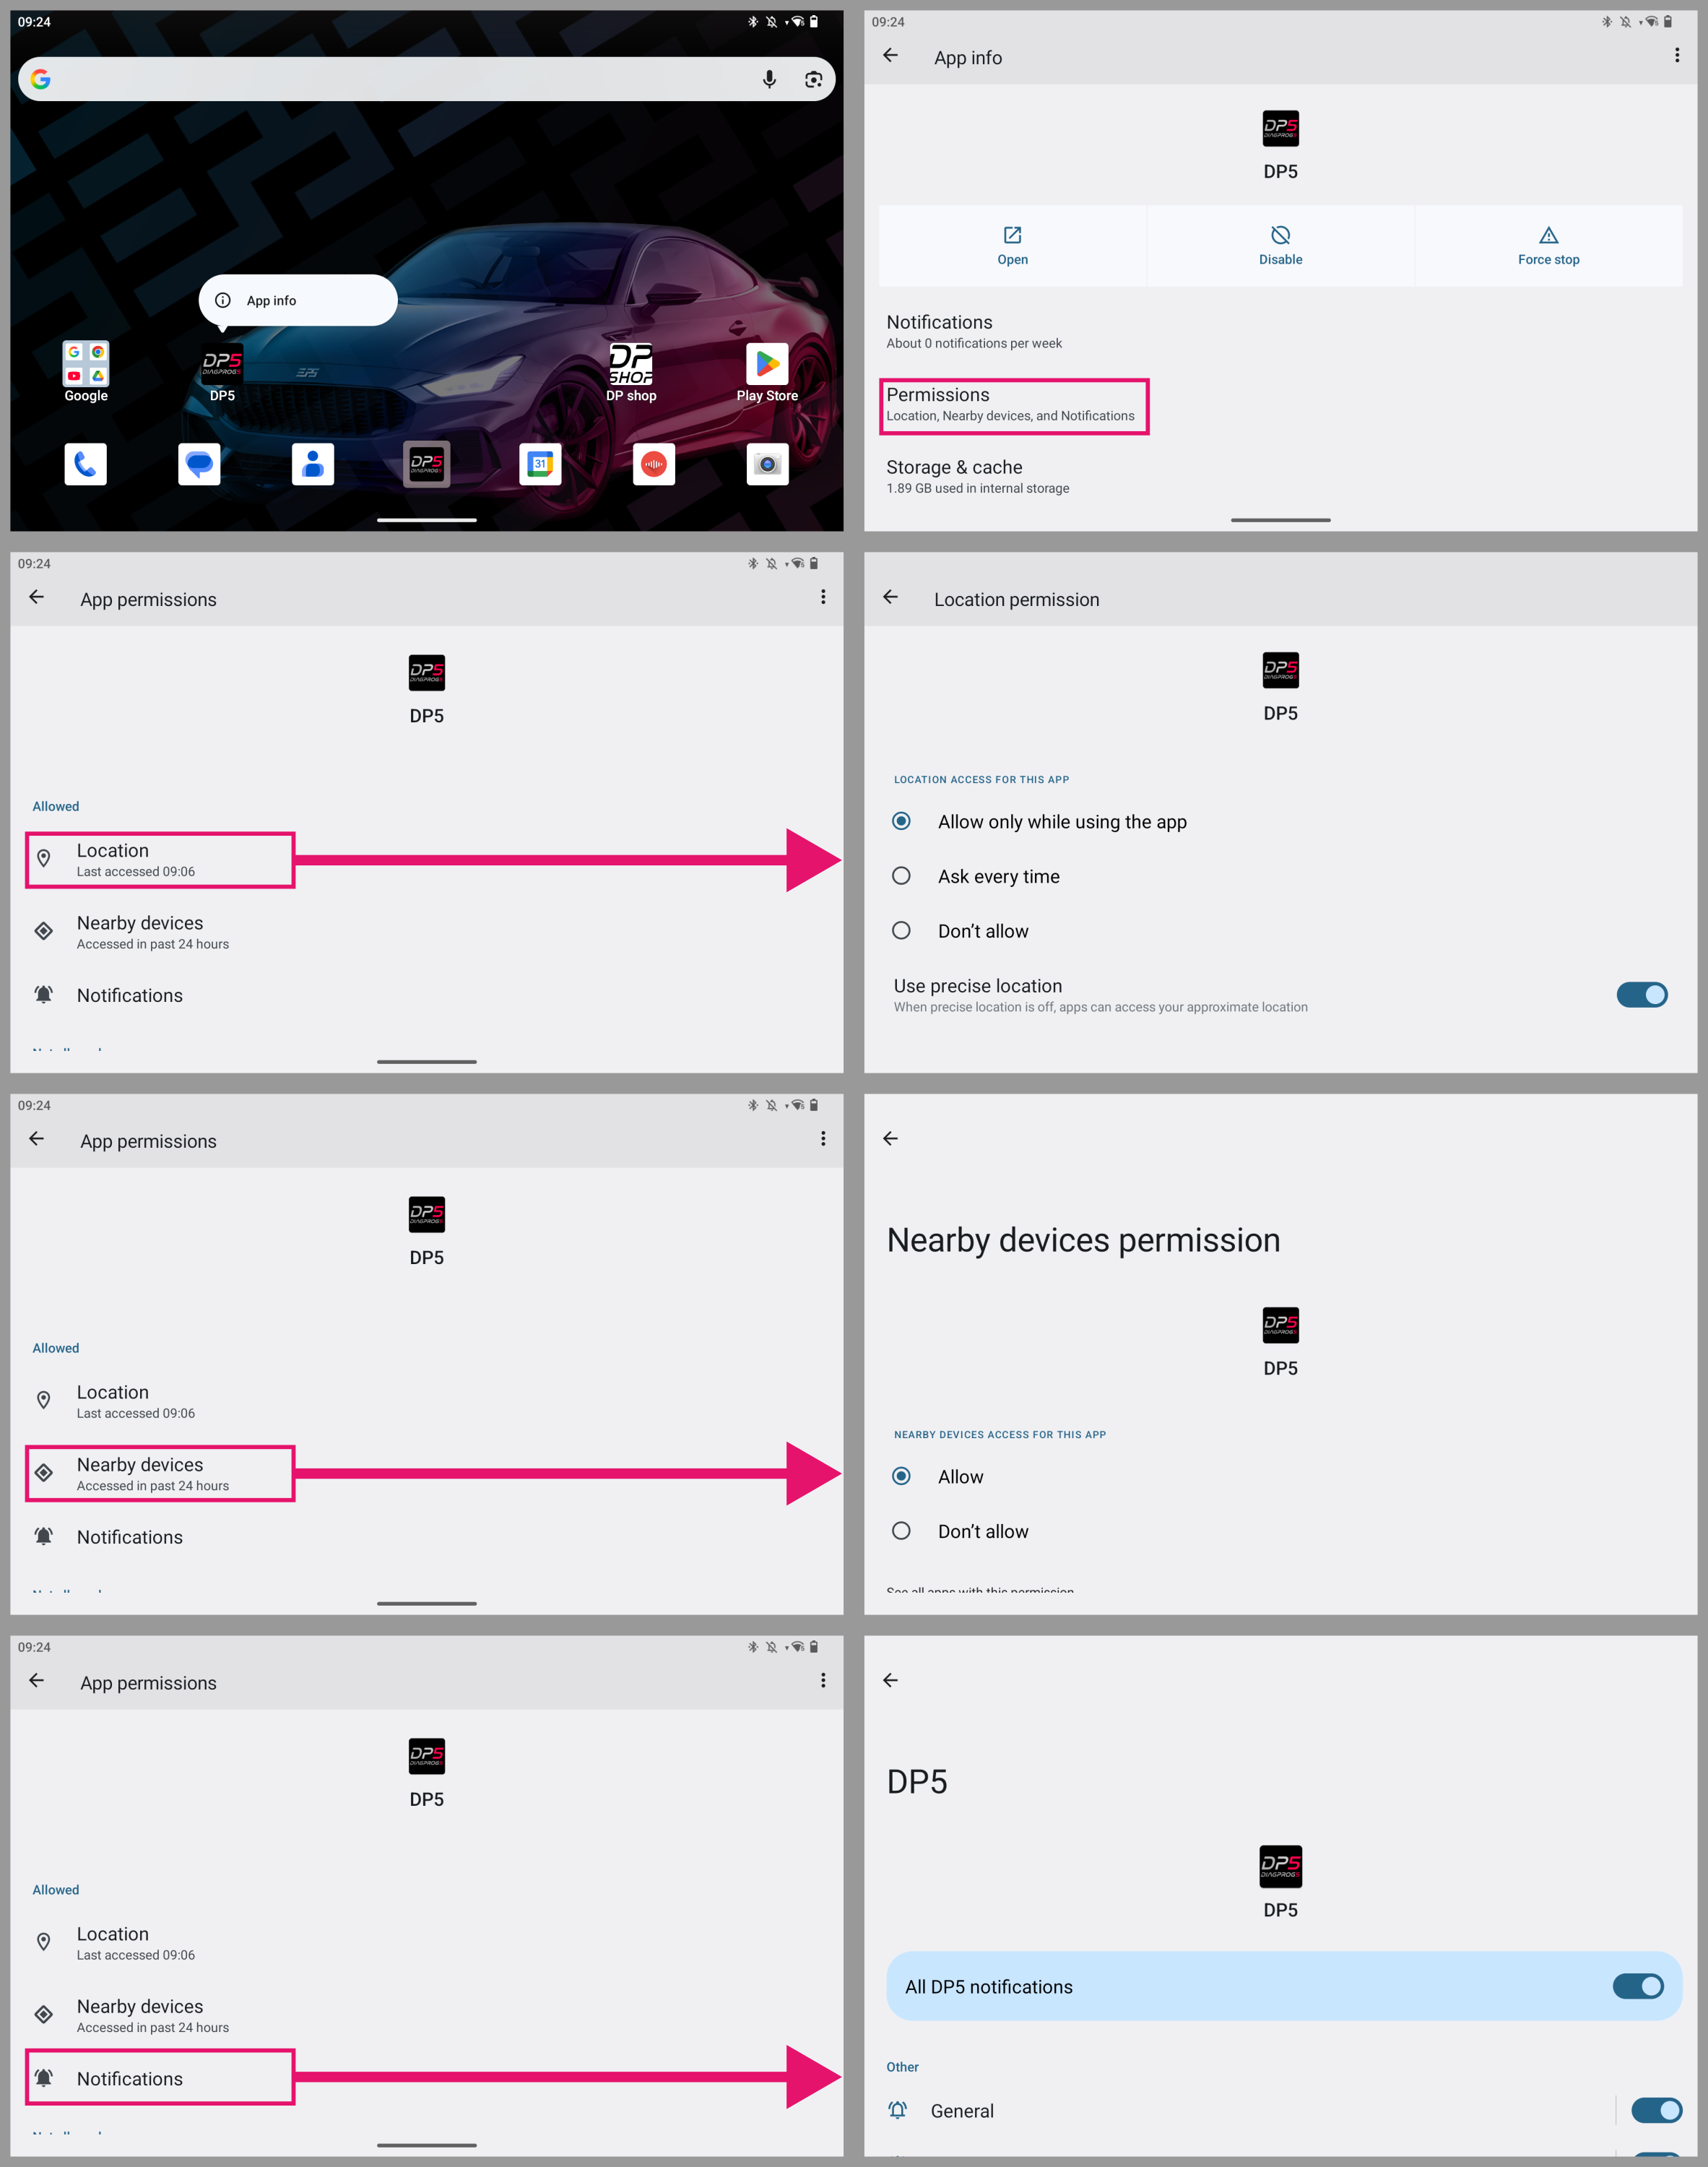

02
Working with DiagProg5


03
UK Sales & Support
Still need help?
Our UK team is here to support you with setup, updates and diagnostics.